How to arrange wall picture frames into a gallery wall
Find out how to arrange wall picture frames into a beautiful gallery wall by planning the layout on your floor and testing paper templates on the drywall.
- Styled by Louisa Kimbrough
- 8 minute look
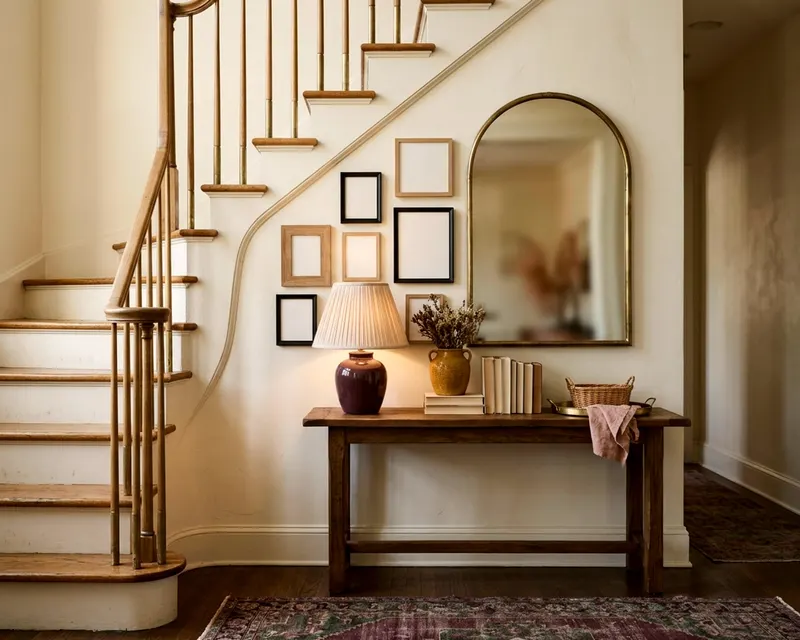
The trick to arranging wall picture frames into a gallery wall is planning the layout on the floor before picking up a hammer. A good arrangement relies on a central anchor piece and consistent spacing. You avoid extra nail holes by cutting paper templates to test the design on the drywall.
Find a common thread for your wall picture frames
Frames need a visual link to hold a gallery wall together. You can mix different materials and shapes, but they require a common denominator to look deliberate. Color provides the easiest connection. Black frames pull a mixed collection of photographs into focus.
Natural wood tones bring warmth to botanical prints. Metal frames create a modern look even if the finishes vary from brass to matte black. Thick ornate frames tie together a vintage collection.
For a loose look, mat boards offer a subtle way to unify unmatched pieces. Crisp white mats give the eye a resting place between colorful prints.
They make a mismatched group feel planned rather than chaotic. The frames can vary in size as long as all the mats share the same white tone.
The subjects inside the frames matter too. A wall of black and white photography looks cohesive regardless of the frame styles. Bright abstract canvases hold together through color intensity.
The frames act as borders, and those borders must talk to each other. Heavy reclaimed wood hung next to sleek silver might jar the eye. A maximalist decorating approach relies on these underlying connections to hold heavy visual weight.
Pick the right wall for a large arrangement
Not every blank wall needs a sprawling gallery. The wall must offer enough breathing room for the frames to stand out. The space behind a living room sofa makes a classic choice.
It provides a wide canvas and naturally anchors the artwork to a heavy piece of furniture. A long hallway also benefits from a gallery arrangement. The frames give the eye something to track as you walk down the corridor.
Avoid cramming a cluster of frames onto a narrow slice of drywall between tall windows. The art will look squeezed. Staircases make good spots for a gallery, but they require careful planning. The frames must step upward to match the angle of the stairs.
Furniture requires empty space below the art. The lowest frames should sit just above the sofa back or console table. This gap stops the art from feeling disconnected from the room.
Lay the gallery wall frame set on the floor
The floor offers the best canvas for your initial layout. Clear a spot in front of the empty wall. Painter's tape creates a temporary boundary on the floor that matches the wall space you plan to fill.
This border gives you a physical limit to work within and keeps the scale accurate. Bring every frame into the taped area. Group them close together at first.
You want to see how the colors and textures play off each other. Move a heavy dark frame away from another dark piece to balance the visual weight. Bold colors should spread across the whole arrangement.
If one corner looks too heavy, swap a massive frame for a pair of smaller ones. You can shift things around for an afternoon until the balance feels right.
Your phone camera provides a fresh perspective. Taking pictures flattens the arrangement. You will spot awkward gaps or color clumps in a photo much faster than you will by staring at the floor.
Try multiple configurations. Build a tightly packed arrangement, a loose grouping and an asymmetrical shape. Compare the photos side by side. Sliding frames on a rug beats pulling nails out of drywall.
Anchor the arrangement with your largest frame
Every gallery wall needs an anchor. The anchor is usually your largest or boldest frame. Place this piece slightly off-center within your taped floor boundary.
A dead-center anchor can make the rest of the arrangement look rigid. Shifting it left or right creates a natural starting point for the eye. Build outward from this focal point.
Medium frames nestle around the anchor. The smallest pieces fill the outer edges. The anchor grounds the collection.
Without a massive piece to hold the arrangement together, a cluster of small frames looks like floating clutter. A heavy mirror or a thick canvas painting works just as well as a framed print, as long as the hardware is rated for its weight. The heaviest piece demands a prominent spot.
Smaller elements simply orbit it. Visual weight requires balance across the wall. A massive dark frame on the left needs a cluster of medium frames on the right to counter it.
If you need inspiration for the rest of the space, you might consider decorating the living room first to ensure the wall matches the furniture scale. Large walls demand substantial anchors.
Leave consistent space between each piece
Even spacing makes a gallery wall look polished. The frames do not need to line up in a perfect grid. The empty space between them just needs to remain uniform.
A gap the width of a tape roll works well for most living rooms. This distance feels tight enough to connect the pieces but wide enough to prevent crowding.
A spacer keeps the gaps even while you arrange the frames on the floor. A roll of painter's tape makes a good spacer. Slide it between adjacent frames.
Adjust the frames until they touch the spacer edge. Repeat this process for every piece in the collection. Consistent gaps trick the eye. They make a random assortment of odd shapes look structured.
Oversized walls sometimes need a slightly wider gap. A massive wall filled with huge pieces might require extra breathing room between frames. Small collections in tight hallways look better with narrower gaps.
Just pick a single distance and stick to it across the entire gallery. Uniform spacing tells the viewer that the arrangement was planned carefully.
Measure the hardware on every frame
Hanging hardware varies from frame to frame. A sawtooth hanger might sit at the very top. A wire might stretch between D-rings.
You must measure the drop on every single frame to get the nails in the right place. Gather these basic tools before you start:
- A roll of wide craft paper for making templates.
- A block of wood or tape roll to use as a spacer.
- A measuring tape to find the wire drop.
- A pencil for marking nail holes on the paper.
- A spirit level to straighten the frames once hung.
Turn a frame face down on a soft surface. Hook your tape measure onto the top edge of the frame. The hanging wire must pull upward toward the top edge, pulling tight just as a nail would hold it.
Note the distance from the top edge to the peak of the taut wire. This measurement is your wire drop. Write this distance down on a scrap of paper and tuck it into the frame corner.
A loose wire requires more drop than a tight wire. You must mimic the tension of the nail when you measure. Pulling the wire gently might give you a false reading.
A heavy frame will pull that wire taut once it hangs on the wall. A taut wire puts the frame where your paper template says. Sawtooth hangers require the same treatment.
The hanger might sit just below the top edge. A wire might drop much lower. Knowing these measurements stops you from hanging a frame too high. You use these numbers to mark your paper templates accurately.
Use paper templates to test the layout on the wall
Paper templates take the risk out of hanging art. Craft paper or newspaper works well for tracing each frame. Cut out the shapes with scissors.
A brief description of the art written on the paper keeps things organized. Transfer your wire drop measurement to the paper template. Measure down from the top edge of the paper and draw a prominent mark.
This mark shows where the nail will enter the wall. Painter's tape secures the paper templates to your wall and is usually gentle on paint. Start with your anchor piece. Place it around eye level.
Build the rest of the paper gallery around the anchor. Step back and look at the wall. The paper cutouts show exactly how much space the gallery will consume.
Adjusting the templates takes little effort. Move a cutout higher if it feels cramped. Slide a template left if it crowds a light switch.
Once the paper layout looks right, grab your hammer. Drive a nail directly through the marked spot on the paper, after checking for wiring or pipes behind the wall and using hardware rated for the frame's weight. Tear the paper away and hang the real frame.
A spirit level resting on the top edge of every frame ensures a straight hang. Crooked frames ruin a careful arrangement.
Add new pieces over time without starting over
A gallery wall can grow with your collection over the years. You do not need to tear down the entire arrangement to add a new photograph. The key is planning for future expansion from the beginning.
An organic layout expands more easily than a strict geometric grid. A grid requires matching frames and perfect symmetry. Adding a piece throws the whole grid off balance.
An asymmetrical arrangement welcomes new additions naturally. You simply attach the new frame to the outer edge of the cluster. The spacing must remain consistent when you add a piece.
Your spacer block gives you the same gap from the existing frames. The new frame hangs using the exact same paper template method. If the new piece throws off the visual weight, you might need to add another small frame to the opposite side of the arrangement.
Styling floating shelves uses a similar balancing act to keep the eye moving across a space. Non-frame objects mix well into the expanding edges.
A small decorative mirror adds texture. A wooden initial breaks up the square shapes. Just ensure these additions share the same spacing rules.
Your gallery wall will spread outward naturally over time.